The Complete RCBO Installation Checklist: Understanding Circuit ID, Labelling and Keeping a Tidy Board Layout
The Complete RCBO Installation Checklist: Understanding Circuit ID, Labelling and Keeping a Tidy Board Layout
RCBO installation starts with a clear checklist. In practice, most avoidable problems show up before an RCBO is even clipped into place, usually through poor circuit identification, rushed prep, or unclear labels that create confusion later.
A common starting point is to be clear on "what should an electrician check before starting RCBO installation in an occupied building"? — Start with safe isolation, confirm the right device for the board, review the circuit schedule, and make sure every outgoing way is identified before anything is removed.
This practical RCBO installation guide should help electricians and facilities managers work cleanly, test efficiently, and leave a board that is easy to understand even months later.
Importance of Correct RCBO Installation
Correct installation is not just about compliance. It affects testing time, fault-finding speed, future maintenance, and confidence in the finished job. Good circuit labelling and a logical distribution board layout make it far easier to trace a fault without disturbing healthy circuits.
This is why RCBO installation best practices matter so much on busy sites. A tidy board with clearly marked circuits reduces callbacks, prevents guesswork, and helps anyone returning to the installation understand exactly what each protective device serves.
Did You Know - A neatly labelled board can save valuable time during inspection, maintenance, and emergency fault diagnosis?
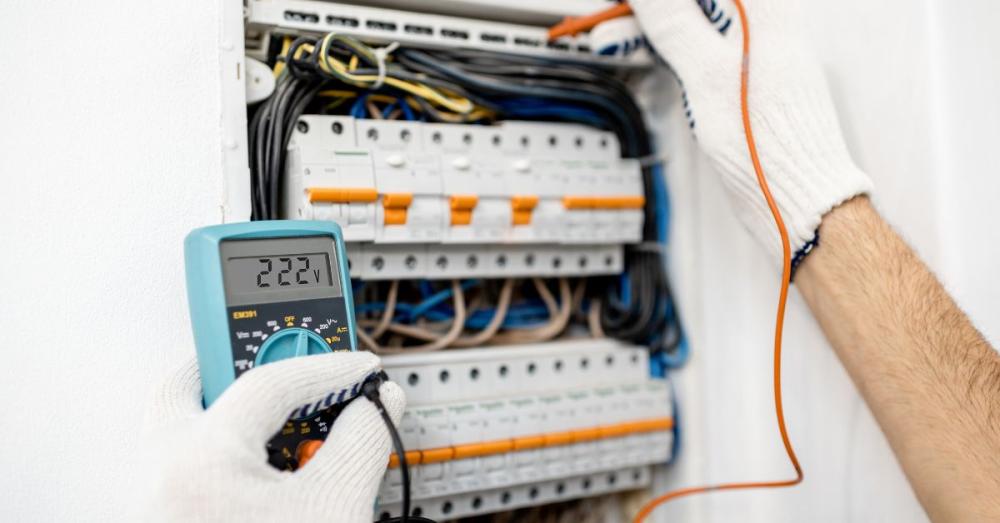
RCBO Installation Checklist Before You Touch the Board
Before any work begins, use this short RCBO installation guide checklist to avoid common setup issues. Many RCBO installation mistakes happen at this stage, especially when installers assume compatibility or skip a proper record of the original board arrangement.
Pre-installation checklist:
- Confirm the consumer unit compatibility and check the RCBO type, current rating, and tripping curve.
- Isolate the supply correctly and prove the board is dead before touching conductors.
- Review circuit schedules, conductor sizes, neutral allocation, and the manufacturer’s instructions.
- Prepare labels, ferrules, markers, test sheets, and a photo of the existing board.
- Check for space constraints, neutral tail routing, and any signs of previous poor consumer unit wiring.
A useful question here is: "what are the most common pre-installation mistakes to avoid in an RCBO installation guide? Usually, it is mixing up circuits, choosing the wrong curve, failing to track neutrals properly, and starting work without a clear labelling plan.
Get this stage right, and the rest of the job becomes much smoother
Source - eFIXX
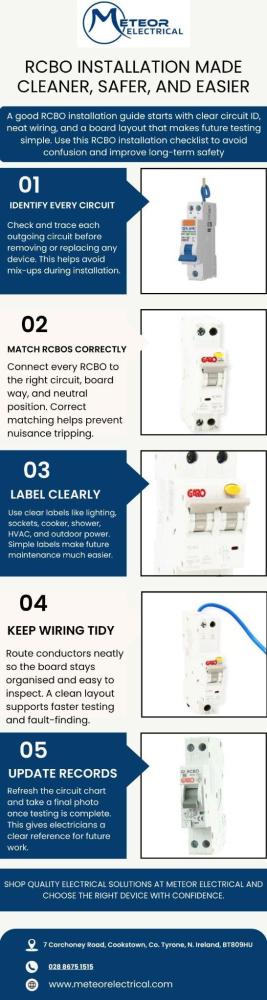
How to Handle Circuit ID, Labeling and a Tidy Board Layout During RCBO Installation
A clean board is not about appearances alone. It is about leaving behind a system that is easy to test, simple to maintain, and safer to work on in future.
- Identify every outgoing circuit before removing or replacing any protective device. If needed, trace and verify each circuit so there is no doubt over what it serves.
- Match each RCBO to the correct way, circuit function, and neutral position. Crossed neutrals are one of the quickest ways to create nuisance tripping and wasted fault-finding time.
- Label circuits clearly and consistently, such as lighting, sockets, cooker, shower, HVAC, outdoor power, and spare ways. Clear circuit labelling beats vague descriptions every time.
- Route conductors neatly so they sit logically within the board. A tidy distribution board layout should allow another electrician to follow the wiring path without second-guessing it.
- Update the circuit chart and take a final photo record once testing is complete. That simple step supports future maintenance and shows a professional finish.
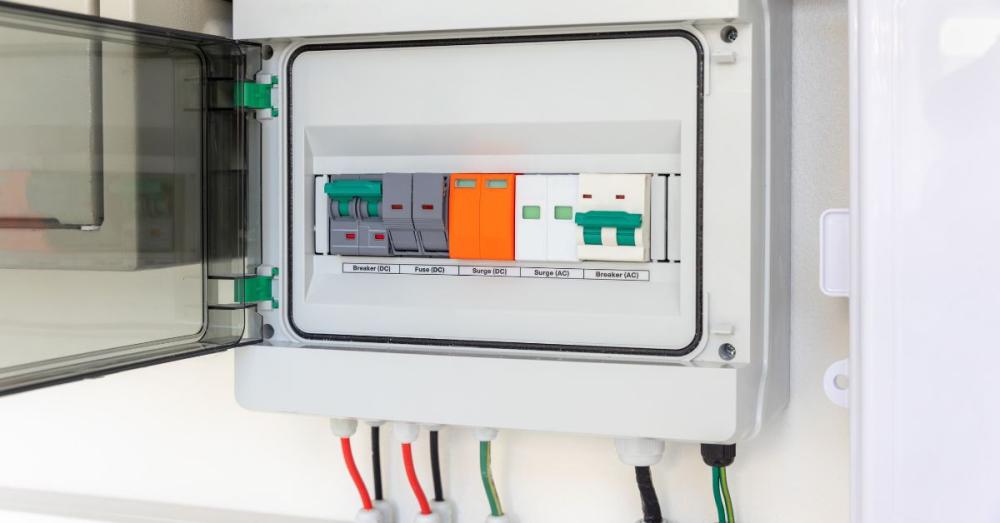
Choosing the Right RCBO for the Job: Top RCBO Picks from Meteor Electrical
Choosing the right RCBO is part of good installation planning. It also helps buyers who want to compare protection options before they buy consumer unit online.
1. 20A 6kA RCBO 1 Mod 2P 30mA Characteristic B GARO
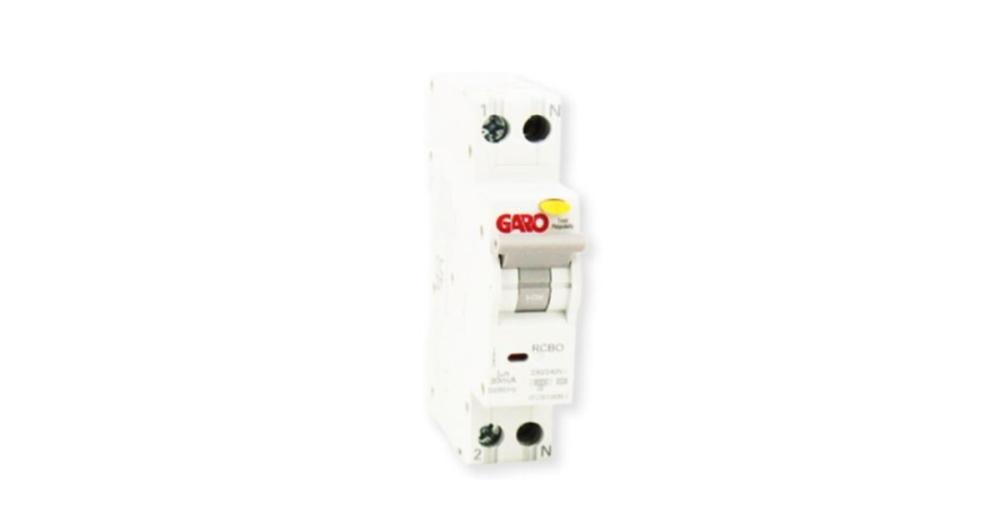
A compact option for general-purpose circuits where space matters and dependable residual current protection is essential. Its single-module footprint makes it especially useful in tighter boards.
Key features
- 6kA breaking capacity
- 30mA sensitivity
- 2-pole protection
- Compact 1-module design
- Type B tripping characteristic
Shop GARO 20A 6kA RCBO 1 Mod 2P 30mA Characteristic B
2. 40A RCBO, 2 Pole, C Curve, Type A, 6kA GARO
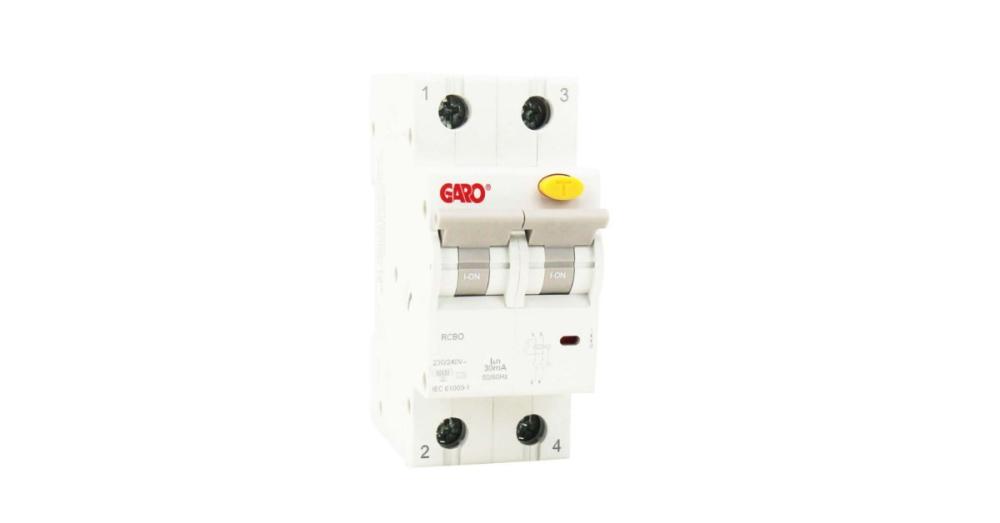
A strong fit for circuits that may see moderate inrush current, including some lighting and small inductive loads. It combines practical protection with a format familiar to many installers.
Key features
- 40A current rating
- 2-pole design
- C curve operation
- Type A residual current detection
- DIN rail mounting
Shop 40A RCBO, 2 Pole, C Curve, Type A, 6kA GARO
3. 10A 6kA RCBO 1Mod 1P 30mA Char B 1 Meter Neutral Tail GARO
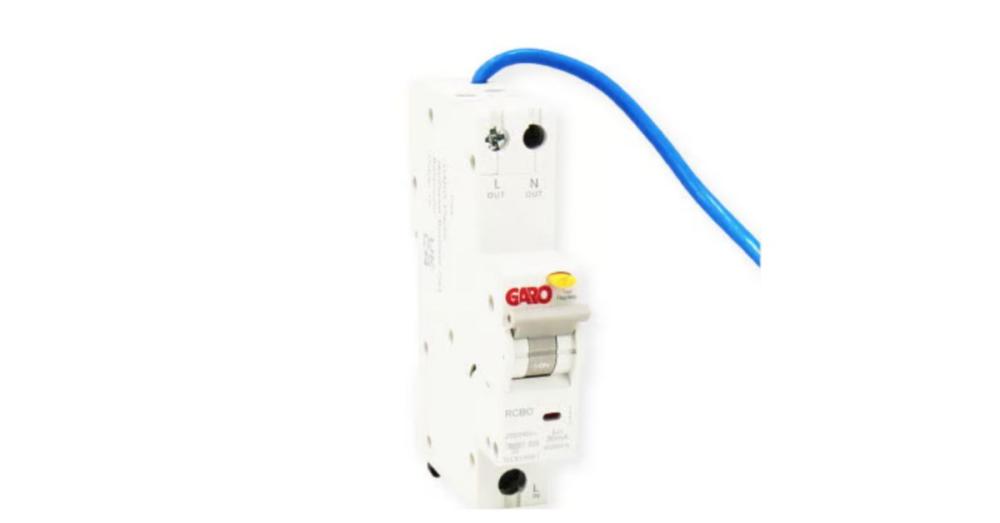
This is a handy choice for installations where board access is awkward or conductor routing is less straightforward. The neutral tail can make life easier in crowded layouts.
Key features
- 10A rating
- 1-metre neutral tail
- 30mA protection
- 6kA breaking capacity
- Compact 1-module profile
Shop 10A 6kA RCBO 1Mod 1P 30mA Char B 1 Meter Neutral Tail GARO
4. Live Single Module Double Pole 40A B Curve 30mA Type A Mini RCBO
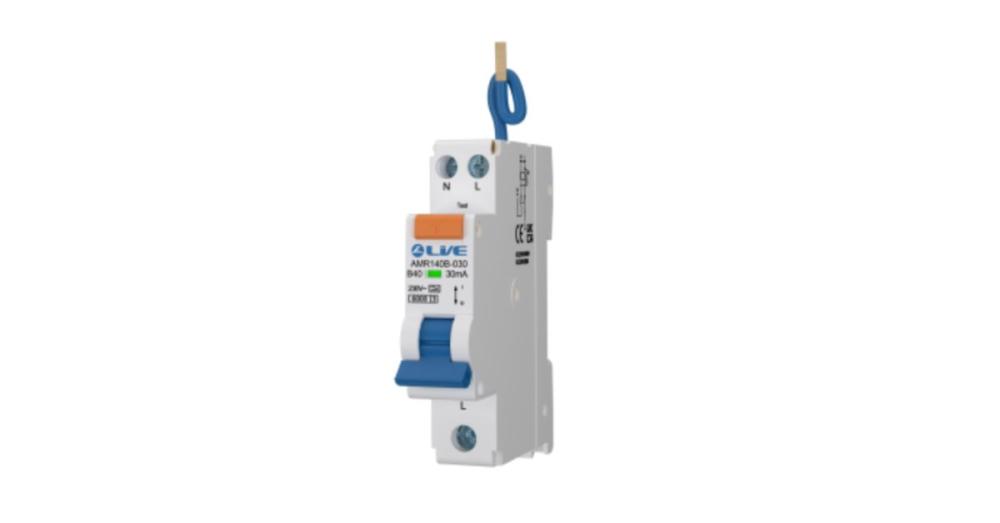
A smart option where both compact size and full protection are priorities. Its switched neutral design supports targeted isolation while keeping unaffected circuits running.
Key features
- 40A current rating
- Single-module compact body
- Double-pole protection
- Type A device
- 30mA residual current sensitivity
Shop Live Single Module Double Pole 40A B Curve 30mA Type A Mini RCBO
Key Takeaways
- RCBO installation should always begin with safe isolation, device compatibility checks, and clear circuit identification.
- Poor labelling, crossed neutrals, and rushed preparation are some of the most common causes of RCBO installation issues.
- A tidy distribution board layout makes testing, maintenance, and future fault-finding much easier.
- Each circuit should be clearly labelled with its function, such as lighting, sockets, cooker, shower, HVAC, or outdoor power.
- Installers should update the circuit chart and take a final photo record after testing is complete.
- Choosing the right RCBO based on rating, curve type, sensitivity, and board layout helps improve safety and long-term performance.
Conclusion: Install with More Confidence and Choose the Right RCBO Faster
The best RCBO installation jobs are the ones that stay easy to understand long after the cover is back on. Accurate circuit ID, clear labels, and a tidy board layout make testing simpler, maintenance faster, and future fault-finding far less stressful.
Compare options and buy consumer unit online with confidence at Meteor Electrical. Meteor Electrical gives you a practical place to explore RCBOs for different circuits and board setups.
Choose the right device with confidence and shop now to keep your next installation cleaner, safer, and easier to manage.
FAQs About RCBO Installation
1. What is the first thing to check before RCBO installation begins?
Check safe isolation first, then confirm the board compatibility and the correct RCBO rating for the circuit.
2. How should circuits be labelled after fitting an RCBO?
Use clear, consistent names that describe the circuit properly, then update the circuit chart so future testing is straightforward.
3. Can you mix different RCBO brands in one consumer unit?
It is not usually recommended unless compatibility is clearly confirmed by the manufacturer. Fit and performance can vary between brands.
4. What causes a messy board layout after RCBO installation?
Poor conductor routing, unclear neutral management, weak planning, and rushed retrofits are the usual causes.
5. How do you choose the correct RCBO rating for each circuit?
Match the RCBO to the circuit load, cable size, application, and required tripping characteristics, while keeping residual current protection in mind.