Smart Thermostat Installation Basics: Control Wiring, Relay Placement and Handover Settings
Smart Thermostat Installation Basics: Control Wiring, Relay Placement and Handover Settings
A well-set control system can be the difference between a smooth-running site and a Monday-morning flood of comfort complaints. In fact, the Carbon Trust has highlighted that buildings can waste around 30% of their energy through poor control and operation, which is why smart thermostat installation is now as much about commissioning as it is about cabling.
This guide is for electricians and facilities teams who want quick wiring clarity, practical relay decisions, and handover settings that actually stick. You’ll learn control wiring essentials, relay placement options, commissioning steps, and the compliance pitfalls that lead to callbacks.
Pre-Installation Site Checks: Compatibility, Loads, and Control Strategy

Before you lift a screwdriver, confirm what you’re controlling and how it expects to be controlled. Most mystery faults are really compatibility issues discovered too late.
- Identify the HVAC control type: 24V low-voltage, 230V switched live, dry contact, 0–10V input, or BMS integration (BACnet/Modbus gateways, vendor-specific I/O)
- Verify power requirements: Check transformer capacity and voltage under load
- Confirm isolation points: locate the correct isolator, label it, and ensure safe access for future maintenance
- Determine the plant: boiler, fan coil unit (FCU), air handling unit (AHU), heat pump, or electric heater all have different switching and interlock expectations
- Check I/O needs: single-stage vs multi-stage, heating/cooling changeover, fan outputs, remote sensor inputs, occupancy contacts
Then decide the control strategy early:
- On/off control is simple, but can short-cycle plant if not configured properly
- Proportional control (or wider deadbands with anti-cycle logic) often improves stability and plant life
- Schedules and zoning: align with how the building is actually used, not how it was designed on paper
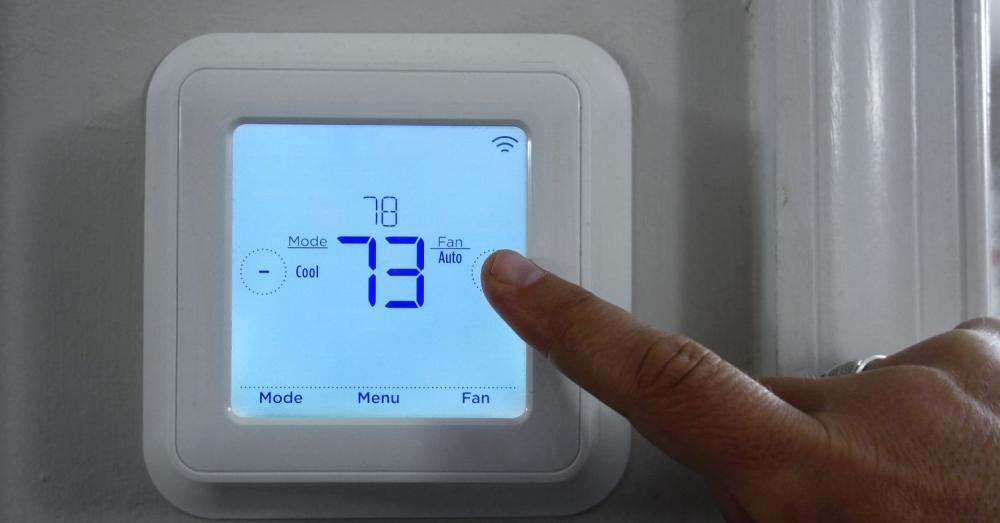
Smart Thermostat Installation: Control Wiring Basics
Good wiring should be tidy, clearly labelled, and easy to troubleshoot. Use the thermostat wiring diagram as the final as-built record.
Segregation and Routing
- Keep control wiring segregated from mains where required, especially in shared trunking
- Use ferrules, consistent core IDs, and clear sleeve markers at both ends
- Avoid long parallel runs alongside contactor coils or VSD outputs to reduce noise pickup
Common Terminals You’ll See
You won’t see the same letters everywhere, but these come up often:
- R: supply (often 24V live)
- C: common (return)
- W: call for heat
- Y: call for cooling/compressor
- G: fan
- O/B: heat pump reversing valve
- S1/S2: remote sensor or proprietary bus (varies by manufacturer)
Confirming The C-Wire
If a thermostat needs continuous power, you must confirm C properly rather than guessing:
- Meter between R and C and confirm expected voltage
- Check continuity back to the transformer common
- Watch for power draining behaviour where the device parasitically draws through a load and causes relay chatter or lockouts
Dry Contact Wiring Done Safely
For boilers and packaged units that expect a volt-free input:
- Confirm whether the appliance wants NO or NC logic
- Prove the input with a temporary link first, then wire the thermostat relay contacts
- Keep SELV and mains segregation tidy, especially near boiler terminals
Faults That Cause Repeat Visits
- Reversed polarity on low-voltage systems
- Shared commons across circuits that were never meant to be bonded
- Induced noise creating phantom calls
- Loose ferrules or under-torqued terminals that fail when warm
Leave behind documentation that helps the next engineer:
- As-built wiring diagram
- Terminal map and conductor IDs
- Basic test results (voltage, continuity, functional I/O checks)
Source - Lowe's Home Improvement
Relay Placement and Switching Methods: Panel vs Field, Safety, and Serviceability
A thermostat output is meant to control equipment, not power heavy loads directly. If you use it like a contactor, it will likely fail sooner or cause problems.
When You Need an External Relay
- The controlled load exceeds the thermostat’s rated current
- You’re switching inductive loads (coils, pumps) that generate electrical noise
- You need isolation between control electronics and 230V circuits
- You’re driving a contactor coil and want a serviceable, standard part
Best Relay Locations
- Near the plant: shorter high-current runs, but ensure enclosure rating and access
- In the control panel: clean DIN-rail layout, better segregation, easier documentation
- At the backplate: only if permitted and there’s safe space and heat management
Choosing A Relay
- SPST vs SPDT: SPDT helps when you need NO and NC options on site
- Latching vs non-latching: latching can reduce standby draw, but can confuse fault-finding if status is unclear
- DIN-rail relay modules often win for maintainability and consistent labelling
For coil switching, add suppression:
- Flyback diode (DC coils) or RC snubber (AC coils) to reduce nuisance resets and contact wear
Also think ahead for the next visit:
- Clear isolation points
- Labels that match drawings
- A test point strategy so you can prove control signals without dismantling half a panel
Compliance matters too: earthing, correct IP rating, segregation, and proper fire-stopping where you penetrate risers or compartment walls.

Commissioning and Handover Settings: Schedules, Limits, Calibration, and User Training
Commissioning is where most smart installs either earn trust or create ongoing frustration.
1. Initial Power-Up Sequence (I/O Validation and Fail-Safe Behaviour)
Prove every output drives the correct plant response, and confirm what happens on power loss or network loss.
2. Configure Core Settings: Time, Time Zone, Occupancy Schedule, Setback Temperatures, and Lockouts
A wrong time zone can wreck schedules. Add reasonable setpoint limits and lockouts where needed to prevent energy drift.
3. Heating/Cooling Changeover Settings and Anti-Short-Cycle Protection
Set minimum run times and compressor delays to protect equipment. This is a key step in Smart Thermostat Installation for heat pumps and DX systems.
4. Sensor Setup: Internal Vs Remote Sensor Selection, Calibration Offsets, and Placement Tips
If the thermostat is in a corridor or near a draught, use a remote sensor. Calibrate carefully and document any offsets.
5. Network and Integration Setup: Wi‑Fi/Ethernet, App Pairing, and Optional BMS Handover Notes
If it must integrate with a BMS, confirm addressing, points list, and who owns ongoing changes.
Conclusion
If you want fewer callbacks and more consistent outcomes, standardise your approach to Smart Thermostat Installation across sites and choose products that come with clear documentation and reliable support. Meteor Electrical offers a strong range, straightforward procurement, and the kind of technical support that keeps projects moving.
Visit Meteor Electrical to source your next thermostat and control accessories today!
FAQs
1. What is the most common wiring mistake during smart thermostat installation?
Mixing up control and mains wiring, or misidentifying R/C, leading to power issues and intermittent faults.
2. Do I always need a C-wire, and what are safe alternatives?
Not always, but many smart models need it for stable power. Safe alternatives include using the correct transformer/common, or an approved add-on module where supported.
3. Where should I place the relay: at the panel or near the unit?
Put it where it’s safest and easiest to service. Control panels often win for DIN-rail layout and documentation, while plant-side placement can reduce high-current cable runs.
4. Can a smart thermostat switch 230V loads directly, or should it drive a contactor?
Small loads might be permitted if the rating matches, but best practice for larger or inductive loads is to drive a relay or contactor.
5. How do I set anti-short-cycle and temperature limits to protect equipment?
Enable minimum off-time and run-time, add compressor delay where relevant, and set realistic heating/cooling limits to stop constant hunting and excessive wear.